Add users
To add a user account, you must have the May add and edit (other) users role assigned to your account. Up to two users per site may have this role. The Add button does not display for users without this role.
|
Your site must create unique user accounts for each user of the Pearson VUE applications. Never create generic accounts that are shared among users. For example, you cannot create a user account that has a generic username like "administrator" for sharing. You also cannot use a generic, fake, personal, or shared email address for any user account. Each user must have their own email account. When a user is created in the system, emails are sent to the user's email account where they must select the link to login and set up security questions and passwords. |
Follow these steps to add a new user account:
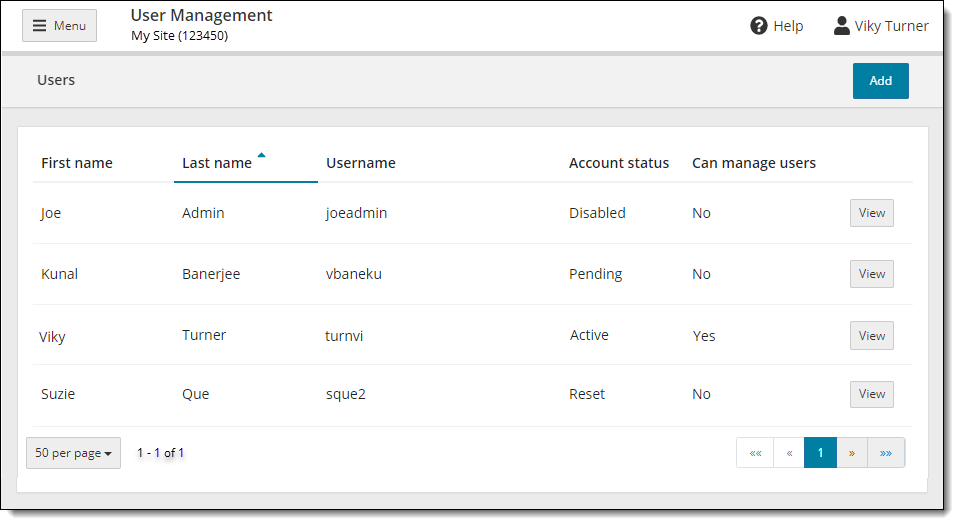
- In Connect User Management, select the Add button at the top of the Users page.


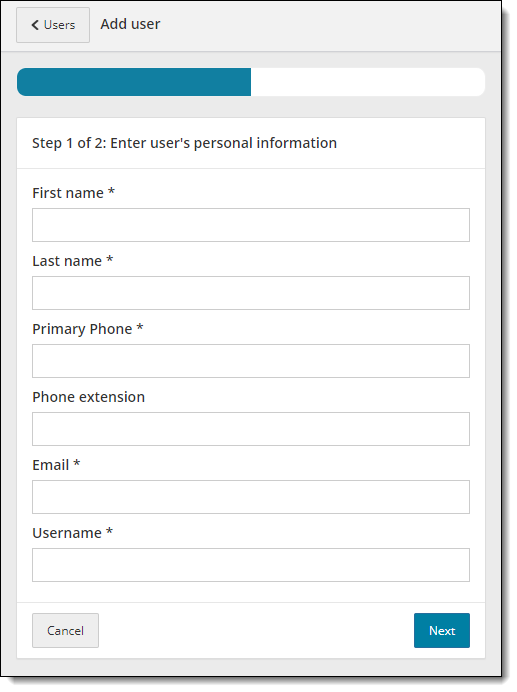
- The Add user Step 1 of 2: Enter user's personal information page opens where you must enter the site user's personal information.


- First name—enter the user's first name. Required field.
- Last name—enter the user's last name. Required field.
- Primary Phone—enter the user's primary phone number. Required field.
- Phone extension—enter the phone extension for the user if they have one. Optional field.
- Email—enter the user's email address. Required field. The email address must be in a valid email address format. The system does not verify if the email address is valid, it only verifies if the email address format is valid.
- Re-enter email—re-enter the user's email address. Required field. The email addresses must match. The system notifies you if the email addresses do not match. The email address must be in a valid email address format. The system does not verify if the email address is valid, it only verifies if the email address format is valid.
- Username—you must enter a unique username for the user. The username cannot match any other user at your site. The username must be a minimum of 2 characters. The system warns you if the username is over the maximum number of characters. Required field.
- Select Next.
|
When you select Next, the user account is created, and an email is generated and sent to the new user. You must assign the user's roles in step 2 below. |
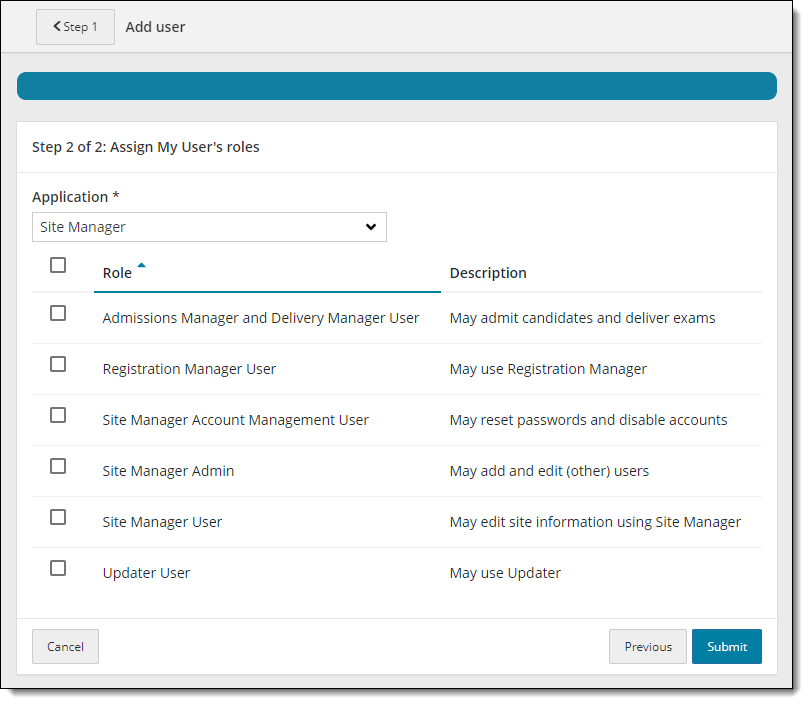
- The Add user Step 2 of 2: Assign user roles page opens where you must select the roles to assign to the user.


|
Up to two users per site may be assigned the May add and edit (other) users role. This role is available to assign to a user if only one user at the site is currently assigned the role. This role is listed, but you are unable to assign this role to a user at your site if two users are already assigned this role. |
- Select the desired Application from the drop-down list. Currently Site Manager is the only option.
- Select the desired role check boxes to assign the roles to the user.
|
ROLE |
DESCRIPTION |
|
May admit candidates and deliver exams |
Standard test center users have access to Admissions Manager to admit candidates for a scheduled exam, and Delivery Manager to launch candidate exams in the exam delivery room so candidates can complete their exams. It also allows users to reprint score reports. This role allows Client proctored - appointment required users to create Events in the Proctoring application, admit candidates for exams, and unlock exams for candidates to complete their testing. When creating Proctor users for Client proctored - appointment required sites, this is the only role that should be assigned to the user. |
|
May use Registration Manager |
Users have access to Registration Manager so they can register candidates for exams at their testing site. |
|
May reset passwords and disable accounts |
Users can reset user accounts for other users that cannot remember their password, and user accounts that have been disabled. This triggers the reset email so users can configure a new password. Users may also disable a user account. This locks the user account and prevents users from accessing any of the Pearson VUE Testing System applications. |
|
May add and edit (other) users |
Users can set up and manage (add, edit, disable, reset, and delete) user accounts for the Pearson VUE Testing System applications. |
|
May edit site information using Site Manager |
Users have editing access to Site Manager. If you do not have this role, you are only able to view Site Manager features. |
|
May use Updater |
Users have access to Updater to schedule or manually start a software update. |
|
May administer affiliated sites |
Users may administer affiliated sites. Only those sites that are configured with affiliate administrative rights will see this role. |
|
If a user is not a Pearson VUE Certified Administrator, do not assign any roles to the user. When they login to Connect they will have access to the following applications in the portal: Connection check, IntelliVUE reporting, RMA connection log, ServiceDirect, Site Manager (read-only), and User Management (read-only). This allows Connect users read-only access to:
|
- Select Submit.
- The user's roles are added to the system and a message notifies you that the user was successfully added.


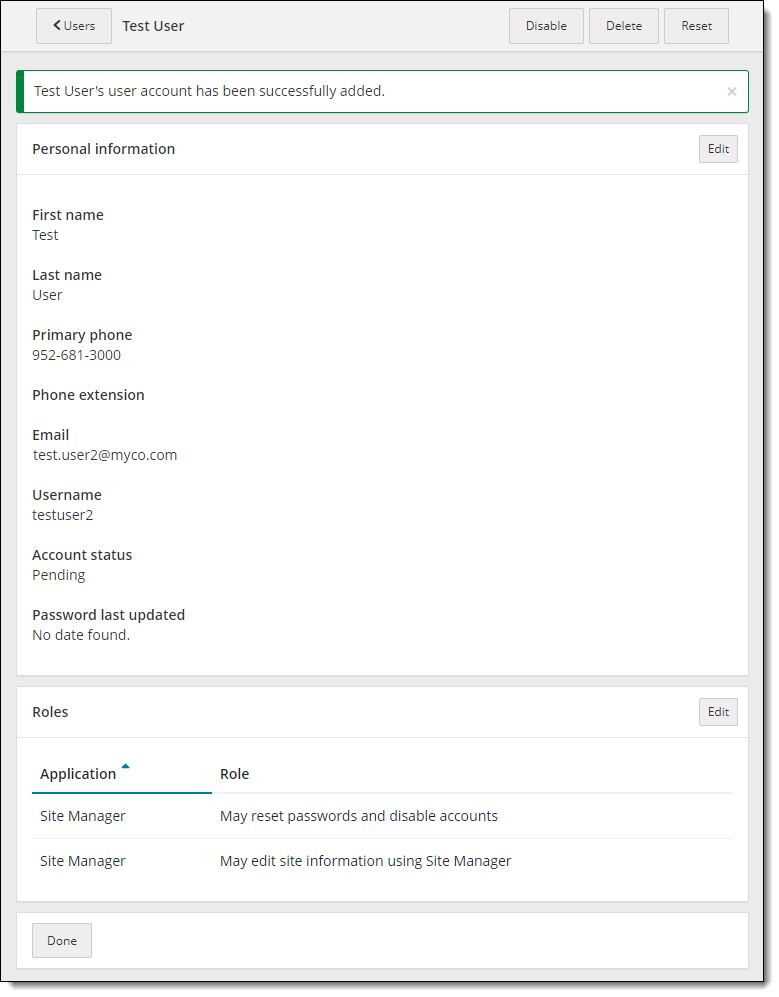
- Select the Users button at the top of the page or the Done button at the bottom of the page to return to the Users list. The user is added to the list in alphabetical order by last name. The new user status is set to Pending until the user logs in for the first time and sets their security questions and password.


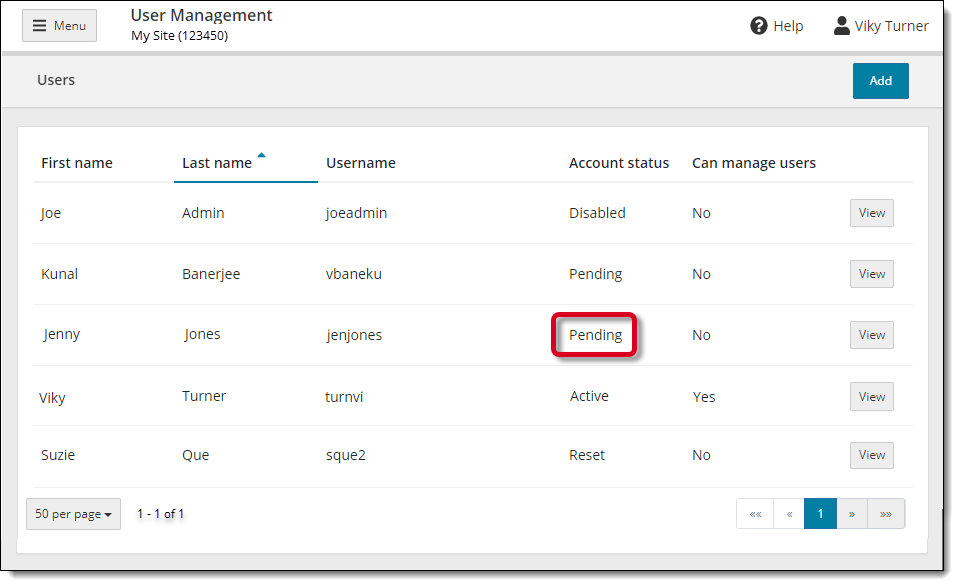
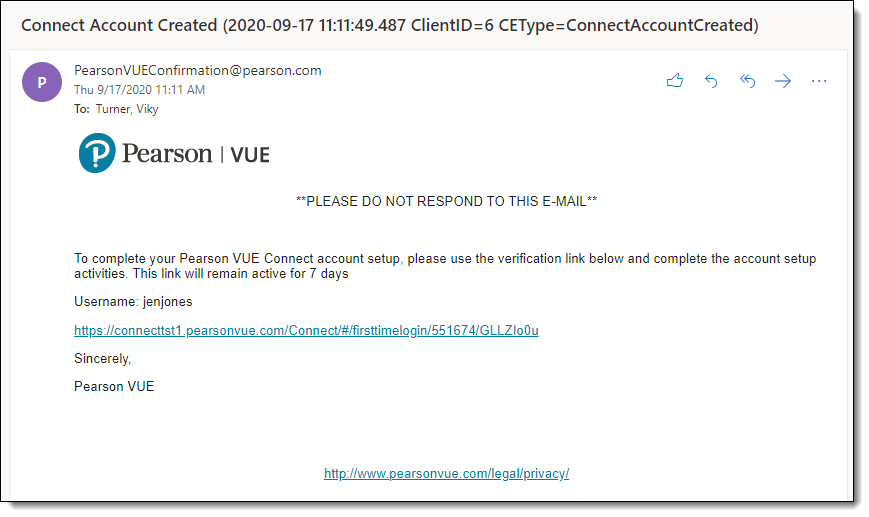
- The system generates a Connect Account Created email notifying the user a Pearson VUE Connect account has been created for them. Users must select the link to add their security questions and setup their password.


|
The link to complete the account setup activities remains active for 7 days. The new user must access their account and complete the setup activities within 7 days. If they do not activate their account within 7 days, users must contact the site administrator to reset their account. Resetting the account generates a new email that allows the user to complete their setup activities. |
See the New User Account Activation topic for details on activating a new user account.
Pearson VUE Proprietary and Confidential