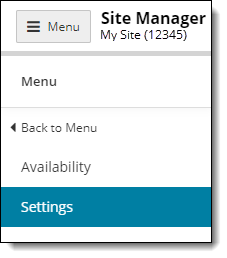
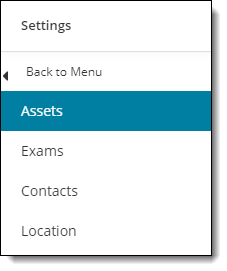
Assets
Assets are resources needed to deliver an exam to a candidate. Assets include the applications used as part of the testing process and supporting materials, such as exhibits. You can add, edit, sort, and remove assets for your site.
The assets you add to your site are tracked by the Pearson VUE Testing System, and they are used to determine whether an exam can be scheduled at your site. It is important to keep your list of assets current.
View assets list
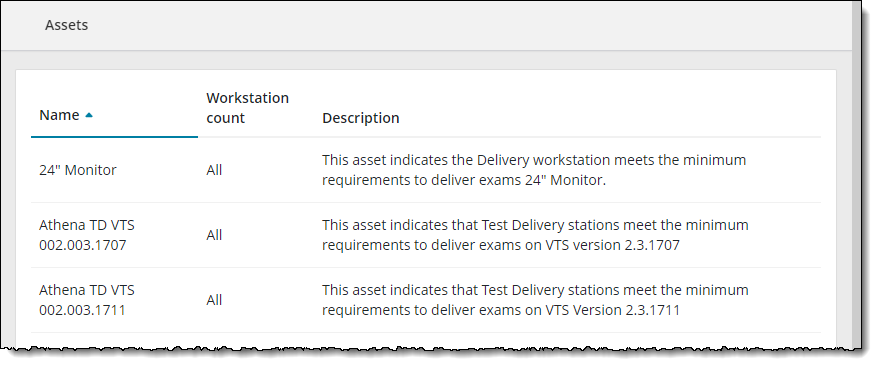
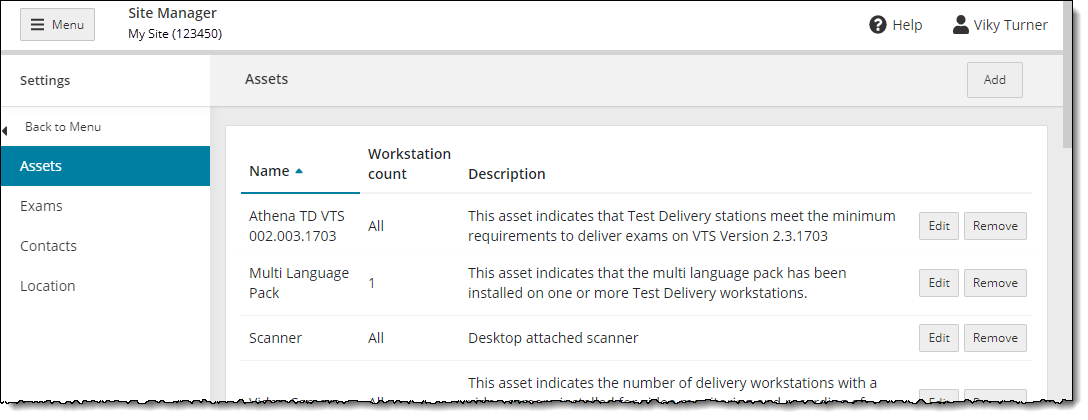
When you open the Assets section, all assets for your site are listed. Users that log in to Site Manager for the first time may see an empty Assets page. Once you add assets, the list includes information about the asset name, the number of workstations the asset applies to, and a description of the asset. ![]()
![]()
No assets added for the site

Site with assets added
|
It is rare for sites to have to add their own assets since most assets are added during VUE Testing System updates. |
|
Users without the May edit site information using Site Manager role can view the existing list of assets, but they are unable to add, edit, or remove assets for the site.
|
Add assets
|
Workstations that are used to deliver exams are managed separately from assets. For more information on managing workstations, see the Workstations section of this help. Any assets you add to your site are available during site hours. |
Use the following steps to add an asset for your site.
- Click the Add button at the top of the Assets page. The Add asset page opens.


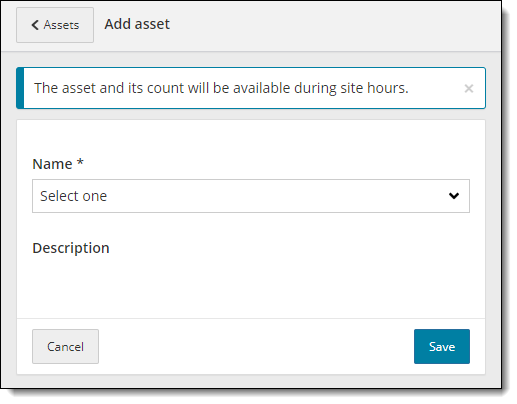
- Select the desired asset from the Name drop-down list. The description of the asset is listed below the selected asset.
|
If you select an asset that is dependent upon a specific VTS release, you are prevented from adding the asset and the system displays an error notifying you the site must upgrade to the specific VTS version or higher.
|
- You must specify how many workstations to apply the asset to.


- Select Applied to all to stipulate that the asset applies to all workstations at your site.
- Select Only a select number and enter the Number of workstations to apply the asset to at your site.
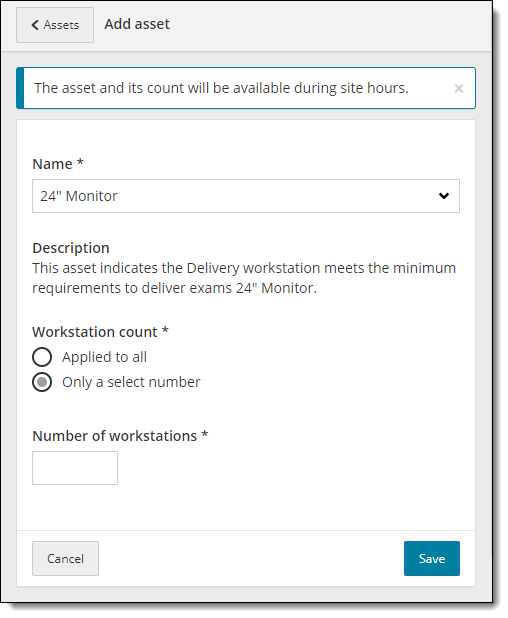
- Click Save to confirm your changes or click Cancel to disregard the changes you made.
The asset appears in the list on the Assets page and a message confirms it was successfully added.

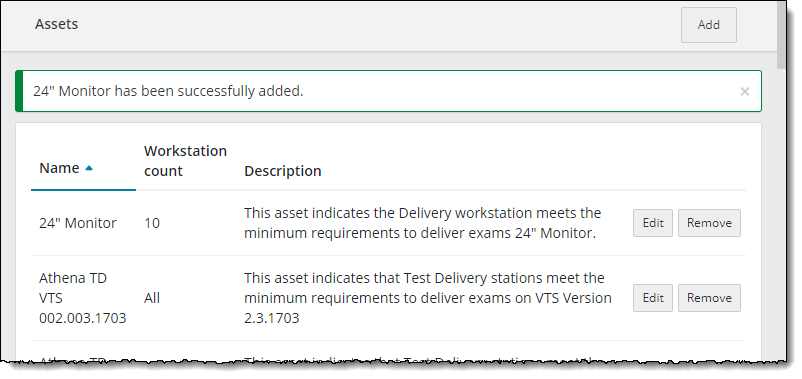
- You may close the message at the top of the page by clicking the x Close button.
Edit an asset
Use the following steps to edit an existing asset.
- Locate the desired Asset in the list and click the Edit button to the right of the asset. The Edit asset page opens.


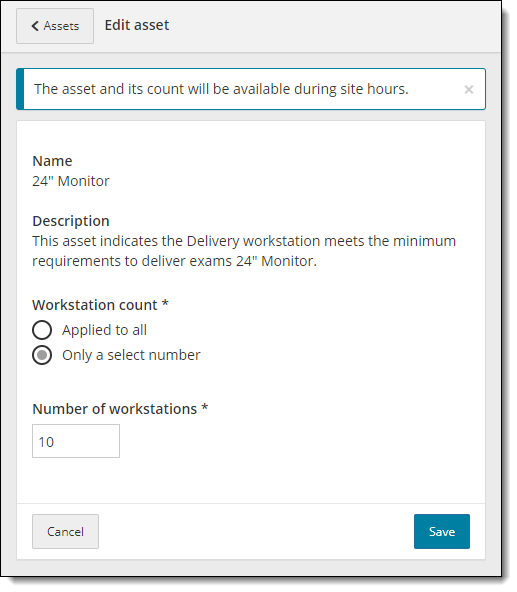
- You are unable to modify the name and description of the selected asset. You can only modify how many workstations are assigned to the asset.
- Select either Applied to all or select Only a select number and modify the Number of workstations to apply the asset to.
- Click Save to confirm your changes or click Cancel to disregard the changes you made.
- A message confirms the selected asset was successfully updated.
- You may close the message at the top of the page by clicking the x Close button.
Remove an asset
Use the following steps to remove an asset from your site.
- Locate the desired Asset in the list and click the Remove button to the right of the asset.
- Click Yes to confirm you want to remove the asset or click No to cancel the removal.


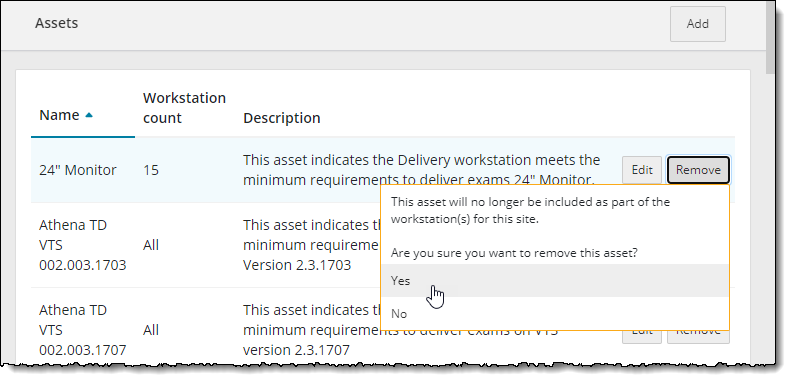
- A message confirms the asset was successfully removed. You may close the message at the top of the page by clicking the x Close button.
|
If you attempt to remove an asset that is already scheduled for a future exam appointment, the system prevents you from removing the asset and a message identifies the specific appointments that are blocking the removal of the asset.
When you remove an asset, it is permanently deleted from the system and cannot be recovered. You must re-add the asset if it was mistakenly deleted. |
Pearson VUE Proprietary and Confidential
